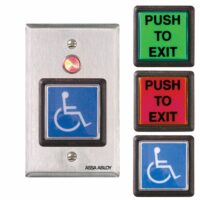
10ACPBSS1 Pushbutton
$ 47.81
- Input: 120 / 240 VAC
- Max Current: 10 A
- Replaceable Bulb
Brand: BEA
17 in stock
Description
BEA 10ACPBSS1 Pushbutton
Technical Specifications
| Technology – Mechanical switch and light socket in modular style component |
| Faceplate – Dimensions Single Gang – 2.75 in x 4.5 in |
| Visual Style – Illuminated Green button that signals activation, which can also be disabled |
| Materials – Stainless steel faceplate with tamper-resistant screws |
| Input Power – 10 A at 125/250 VAC |
| Time Range – Momentary switch, no delay |
| Bulb Power – High Volt Bulb: 60 mA at 24 VDC (P/N C656) |
| Low Volt Bulb – 190 mA at 12VDC (P/N CM-161) |
| Relay – SPDT, color coded wiring (Open/Closed) |
| Operating Temperature: -17°F to 120°F |
| Product Life Test 1 million operations |
CHANGE BULB
The ACCESS CONTROL PUSH BUTTON is packaged with the 28V bulb already installed. If you desire to change to the 14V option (supplied), use the following instructions:
1. Twist the black stabilizing ring counter-clockwise to remove from the assembly.
2. Twist the bulb assembly clockwise to detach from the lens cover.
3. Gently pull the 28V bulb to remove from the bulb socket.
4. Insert the 14V bulb into the bulb socket.
5. Reassemble components in reverse order.
Make electrical connections with wires provided or directly to switch terminals. The ACPB comes packaged with 5 butt-splice connectors. Press the header of a connector to a even position with a crimper or pliers.
Be aware that supplying the 14V bulb with 15V or more will cause irreparable damage to the switch.
WIRE COLOR DESCRIPTION
BULB
RED V +
BLACK V –
SWITCH
BLUE N.O.
YELLOW N.C.
GREEN COM
CHANGE LENS COVER
The ACCESS CONTROL PUSH BUTTON is packaged with 9 interchangeable lens covers. If you desire to change the lens cover, use the following instructions:
1. Twist the black stabilizing ring counter-clockwise to remove from the assembly.
2. Twist the bulb assembly clockwise to detach from the lens cover.
3. From the inside, gently push the white lens cover assembly to separate it from the black lens bracket.
4. Carefully pull on the clear cover to detach it from the lens cover assembly. Do not use tools to pry apart, as it will damage the lens cover.
5. Place the desired lens cover inside and position the cover on the lens covers assembly, and push it in until you hear it snap into place.
6. Reattach the lens cover assembly to the lens cover bracket, and reassemble the components in reverse order.
Additional information
| Weight | 1 lbs |
|---|---|
| Box Dimensions | 6 × 4 × 4 in |
| Mounting Size | Single Gang Box |
| Button Style | Square 2'' |
| Manufacturer |